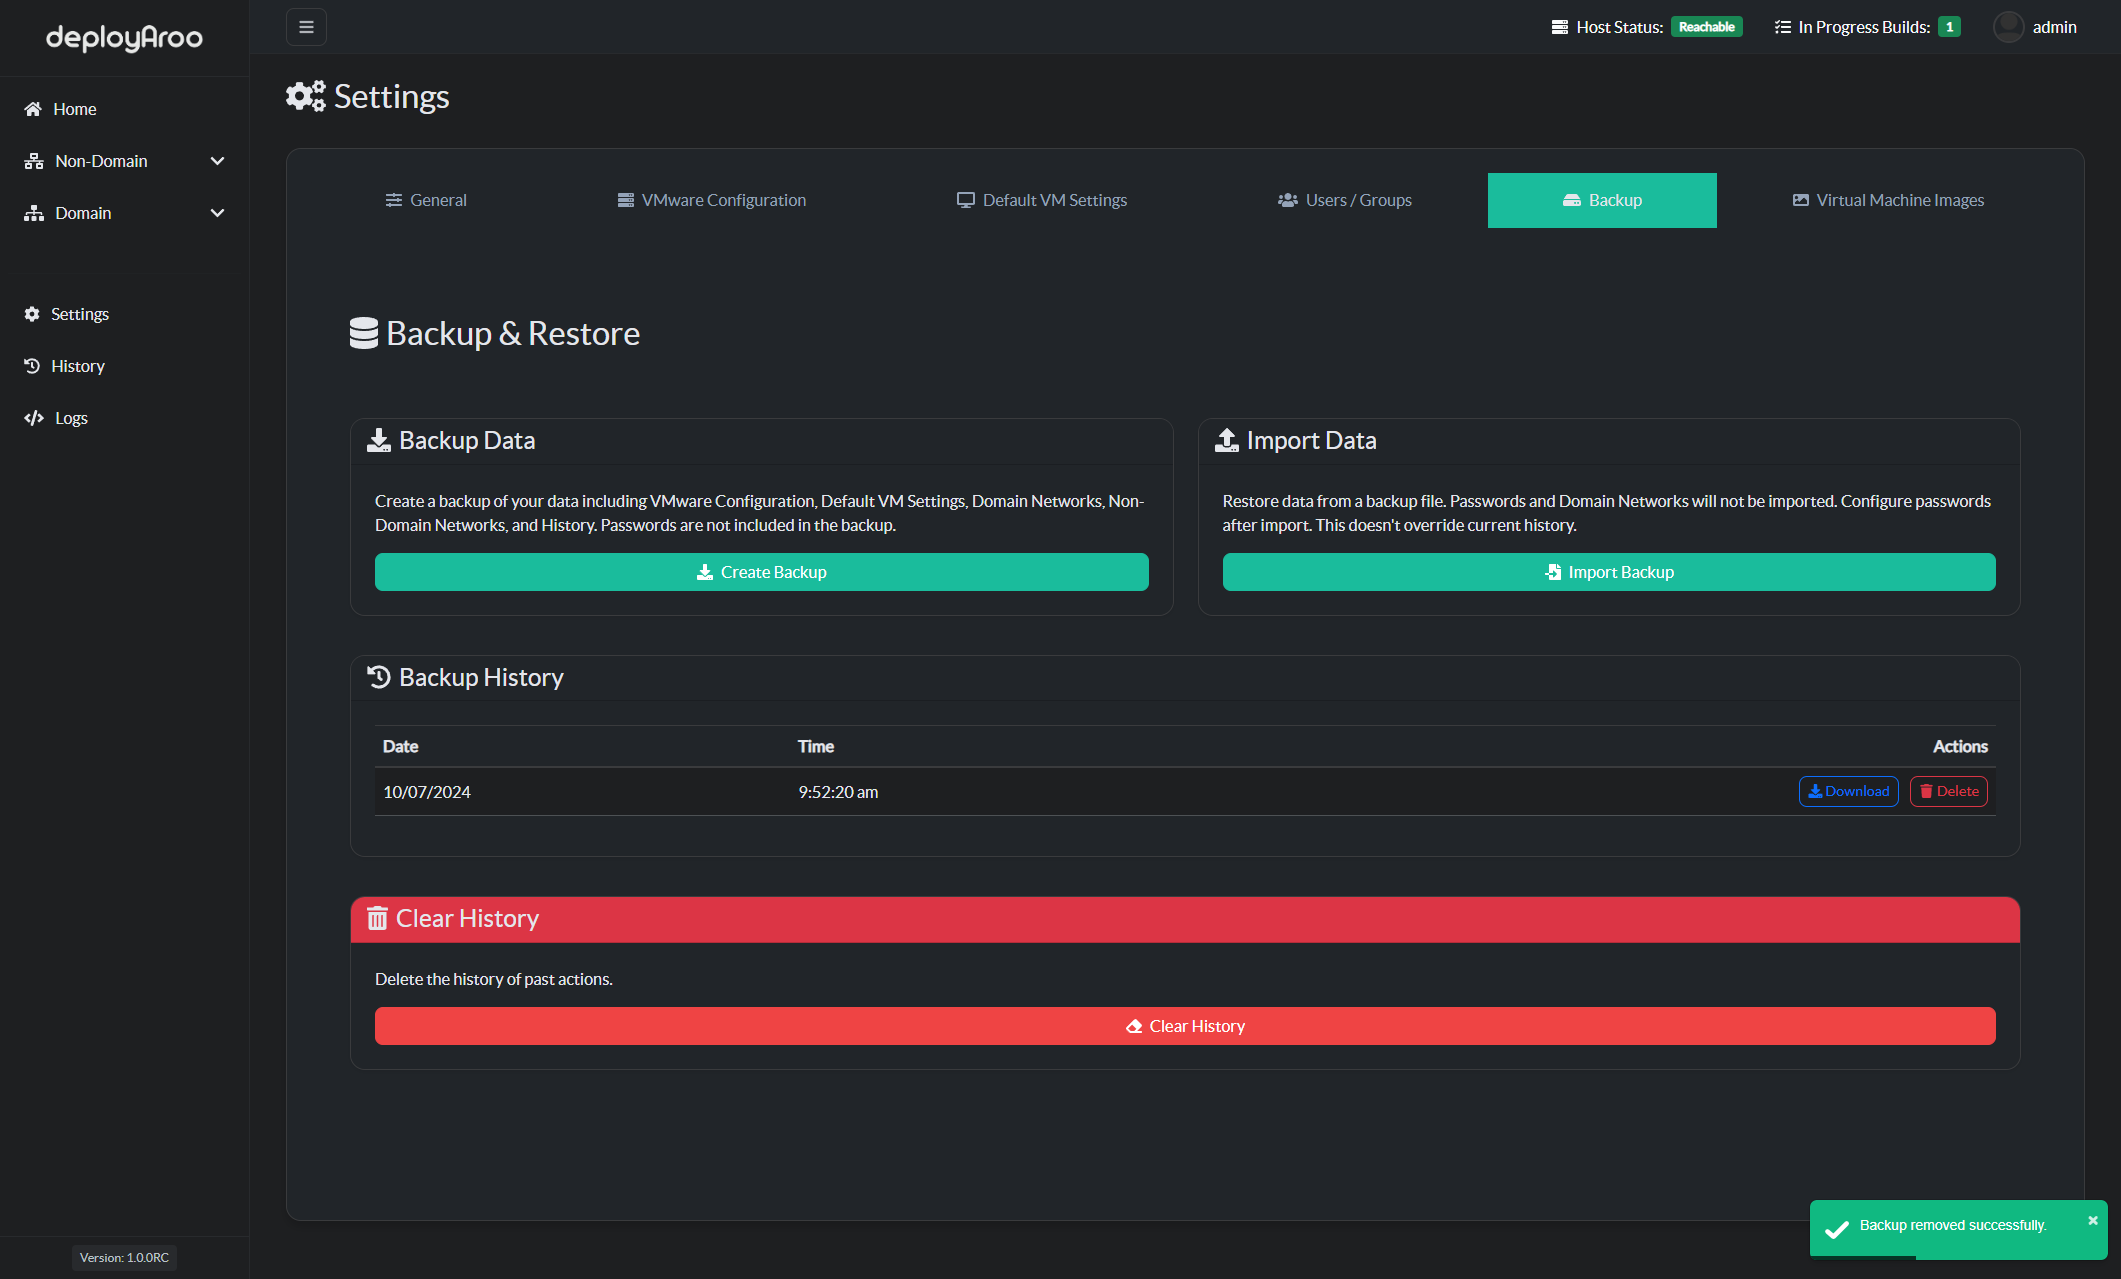
Backup and Restore
1. Accessing Backup and Restore Functions
Navigate to Backup Settings
-
Access Settings Menu:
- Locate and click on the Settings option in the main navigation menu.
-
Navigate to Backup Section:
- Within the Settings menu, find and select the Backup section.
2. Creating Backups
Safeguard Your Deployaroo Data
-
Locate Backup Data Option:
- In the Backup section, find the
Backup Dataarea.
- In the Backup section, find the
-
Initiate Backup Process:
- Click the
Create Backupbutton to start the backup creation process.
- Click the
-
Retrieve Backup File:
- Once the backup is complete, navigate to the
Backup Historysection within the same page. - Locate your newly created backup in the list.
- Click the download option next to the backup to save it to your local system.
- Once the backup is complete, navigate to the
3. Restoring from Backups
Recover Your Deployaroo Configuration
-
Access Import Data Function:
- Within the Backup section, find the
Import Dataarea.
- Within the Backup section, find the
-
Select Backup for Restoration:
- Click to browse your local system and select the backup file you wish to restore from.
-
Initiate Restore Process:
- After selecting the backup file, click
Opento begin the restoration process. - Wait for the process to complete. This may take a few moments depending on the size of your backup.
- After selecting the backup file, click
4. Managing Deployment History
Clear Deployment Records
Note: Clearing history affects only the record of past VM deployments. Your current configuration settings will remain intact.
-
Access History Management:
- Within the Backup section, locate the history clearing option.
-
Clear Deployment History:
- Find and click the
Clear Historybutton to initiate the history clearing process. - Confirm your action if prompted.
- Find and click the
Next Steps
After managing your backups and restores, consider:
Simplify your VM deployments with Deployaroo
Get Started | View Demo (Coming soon) | Report Bug | Request Feature