VM Images Management
1. Overview of VM Images
Understanding Pre-installed and Community Images
Tip: Familiarize yourself with both pre-installed and community images to leverage a wide range of deployment options.
-
Access Pre-installed Images:
- Navigate to Settings > Virtual Machine Images to view default VM images.
-
Explore Community Images:
- Visit the Deployaroo Images Repository for additional pre-zipped images or see the Download Images section of this documentation.
- This documentation includes non-domain, domain, and community playbook images.
2. Adding VM Images
Upload New Images to Deployaroo
Important: Ensure you have the correct zip file containing VM image .yaml and .json before starting the upload process.
-
Navigate to VM Images Section:
- Go to Settings in the left-hand menu.
- Select Virtual Machine Images.
-
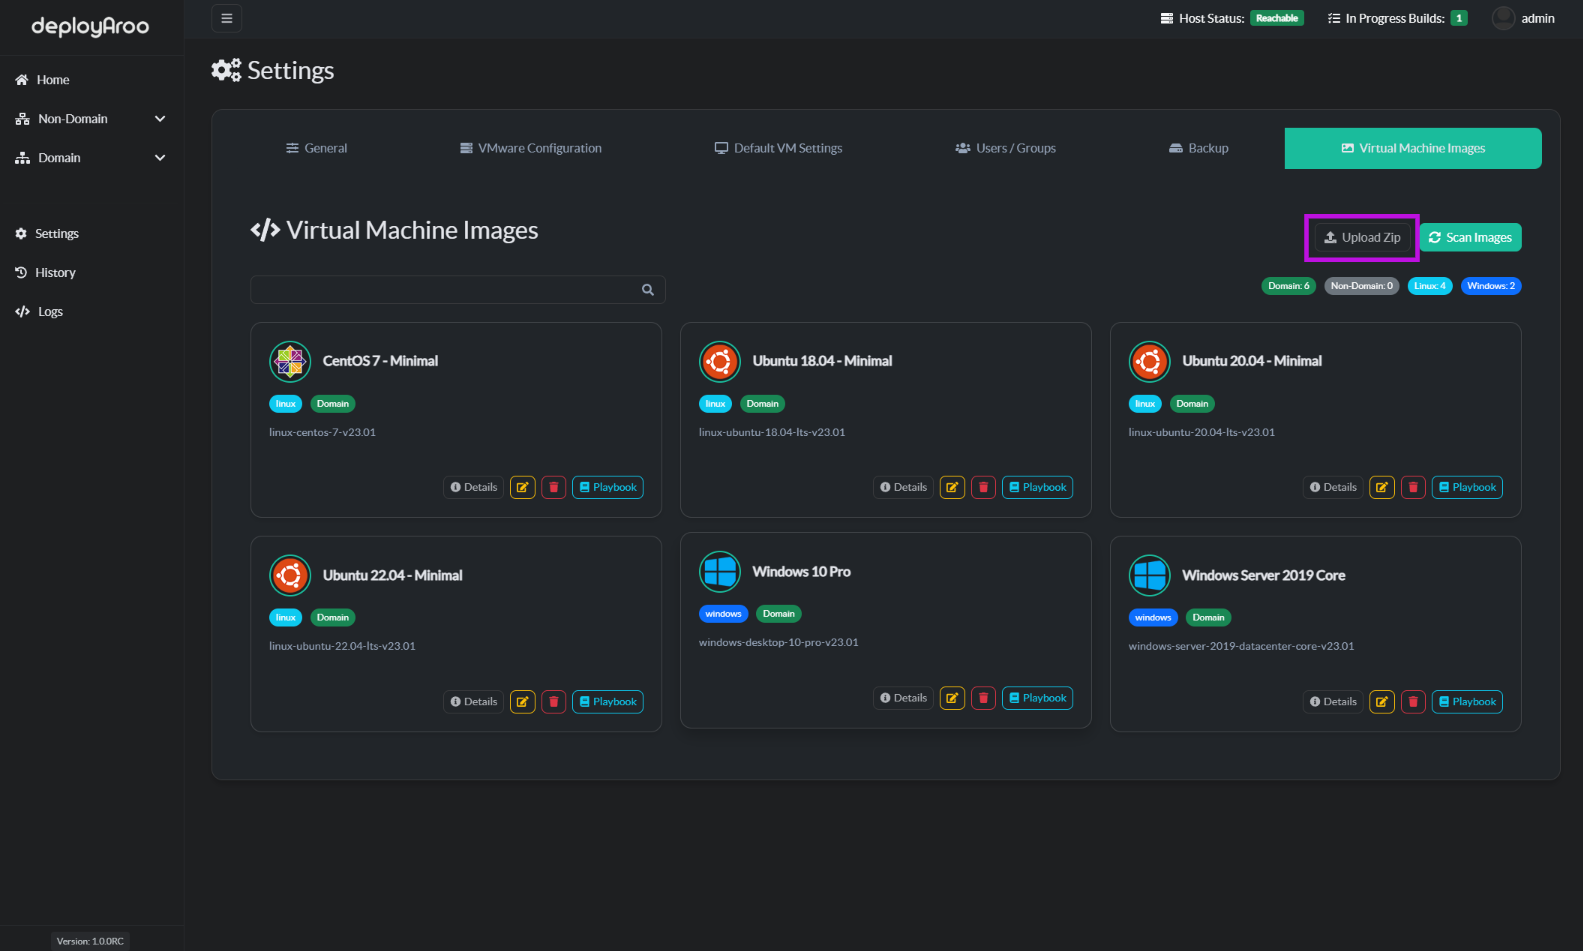
Upload Zip File:
- Click the
Upload Zipbutton at the top right of the screen. - In the file dialog, locate and select your VM image zip file.
- Click
Opento start the upload process. - Wait for the upload to complete and new images to appear in the list.
- Click the
3. Scanning for Images
Update Available VM Images List
Note: Scanning helps keep your VM image list up-to-date with the latest additions and modifications, A scan is required after intial install of Deployaroo.
-
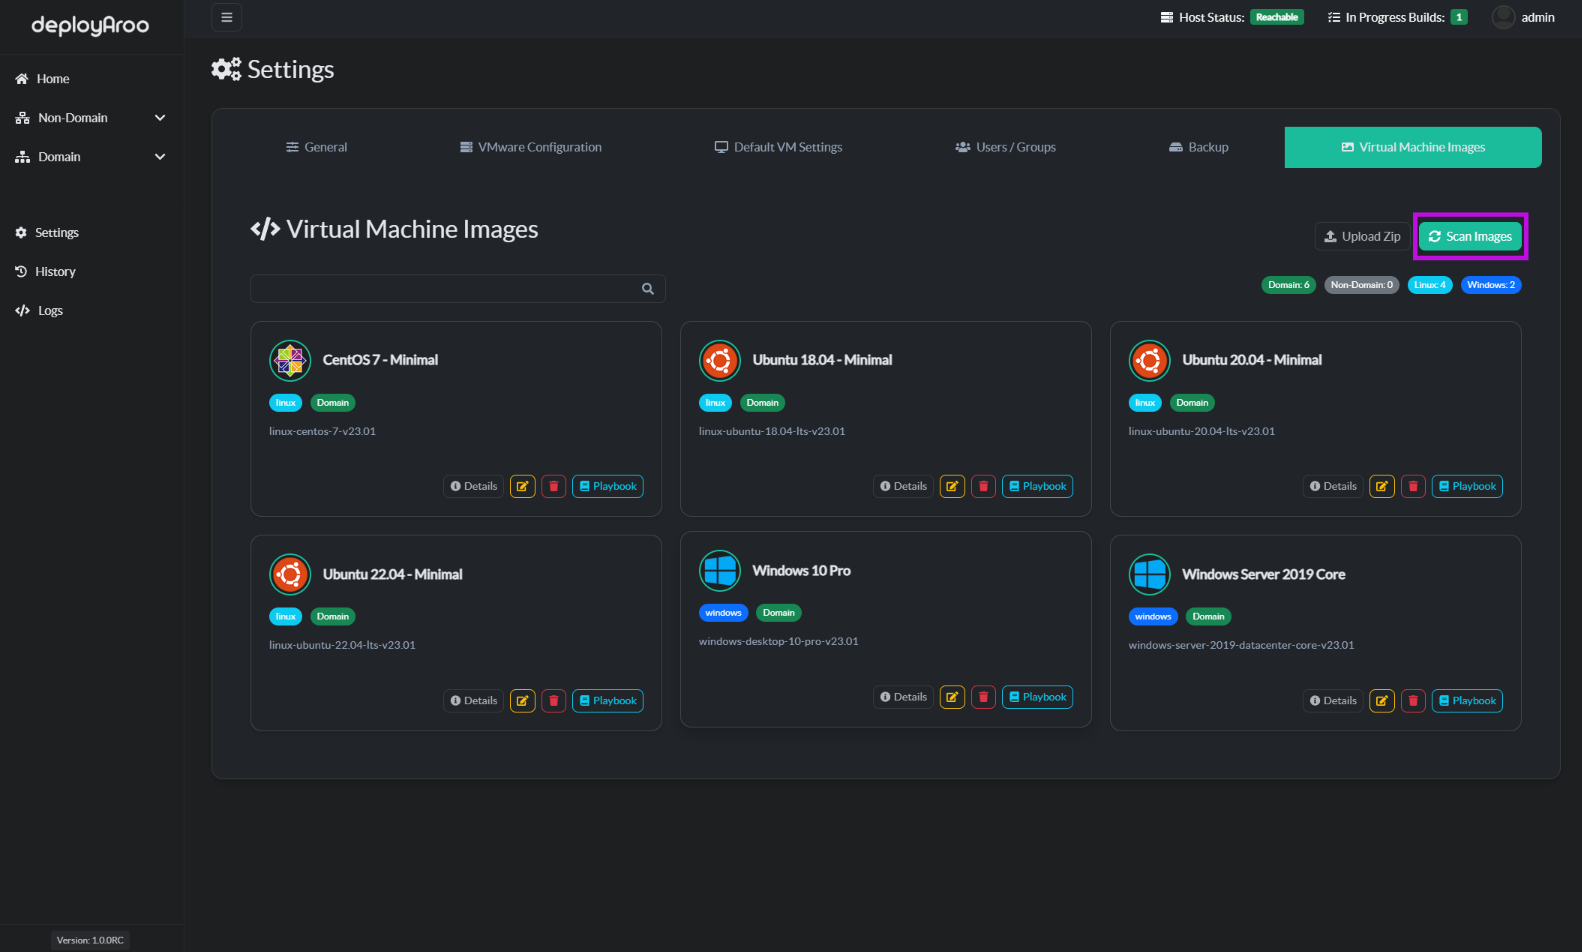
Initiate Scan:
- On the Virtual Machine Images page, click the
Scan Imagesbutton at the top right. - The application will begin scanning for new or updated VM images.
- On the Virtual Machine Images page, click the
-
Review Updated List:
- Wait for the scan to complete. You'll see a notification when it's done.
- The list will automatically refresh to show the latest images.
4. Managing Image Details
View and Modify Image Information
Tip: Regularly review image details to ensure they align with your deployment needs.
- View Image Details:
- On the Virtual Machine Images page, find the desired image.
- Click the
Detailsbutton next to the image. - Review the information in the modal window that appears.

- View Playbook Details:
- Locate the image whose playbook you want to view.
- Click the
View Playbookbutton. - Examine the playbook contents in the modal window.

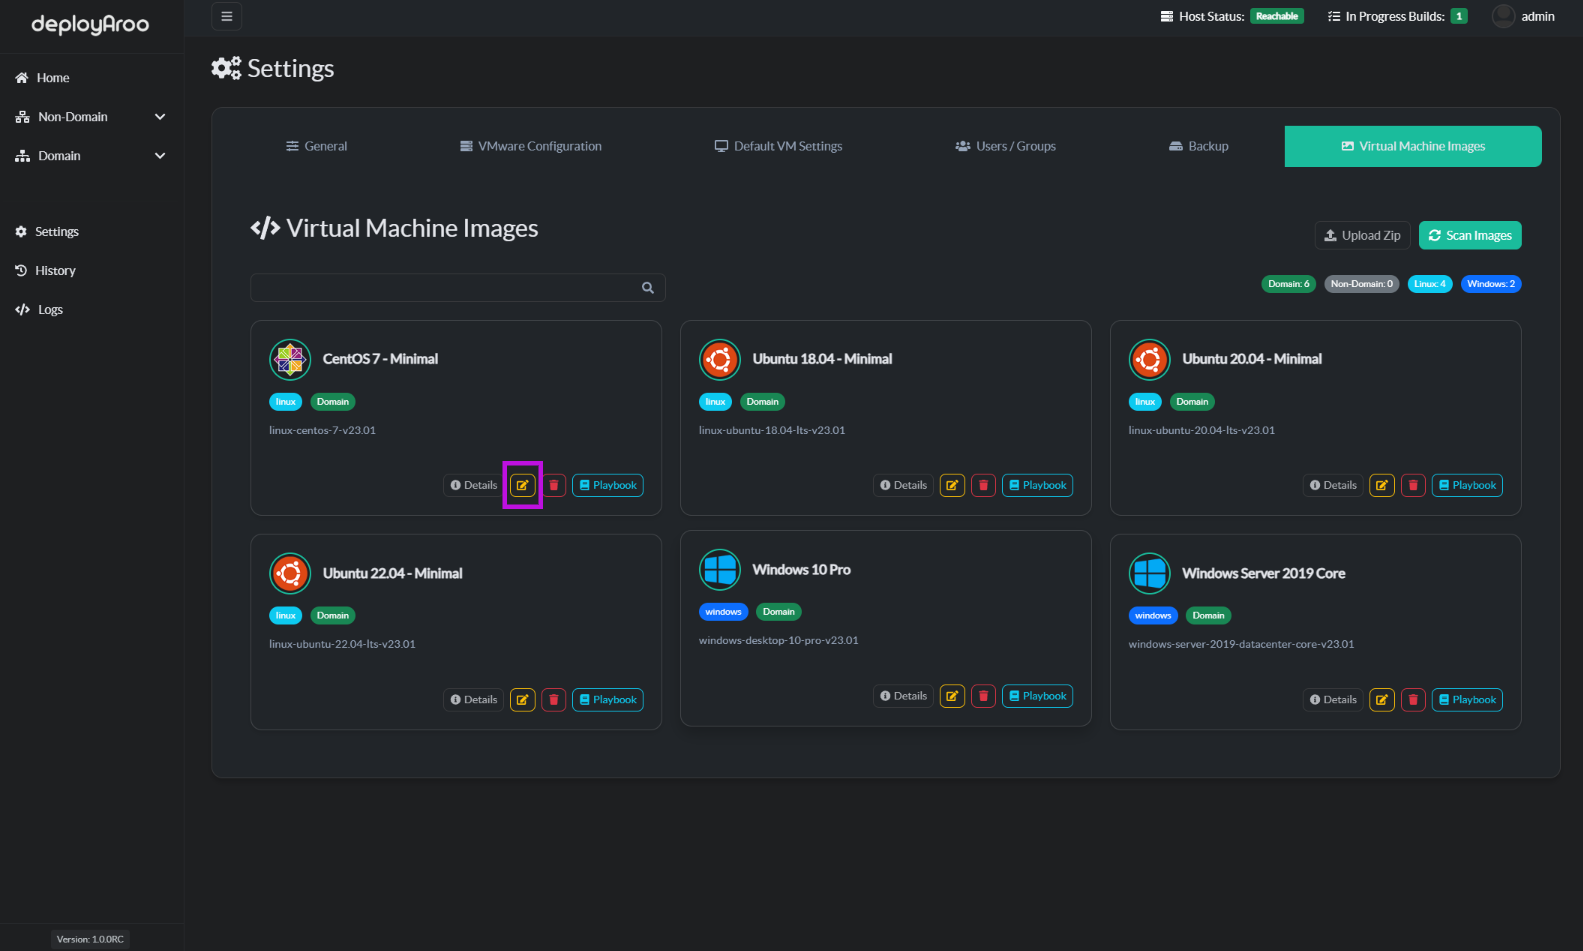
- Modify Image Details:
- Find the image you want to modify and click the
Editbutton. - In the modal window, update the Human Name and Template Name fields as needed.
- Click
Save changesto apply your modifications.
- Find the image you want to modify and click the
5. Deleting Images
Remove Unwanted VM Images
Important: Deleting an image is irreversible. Ensure you no longer need the image before proceeding.
-
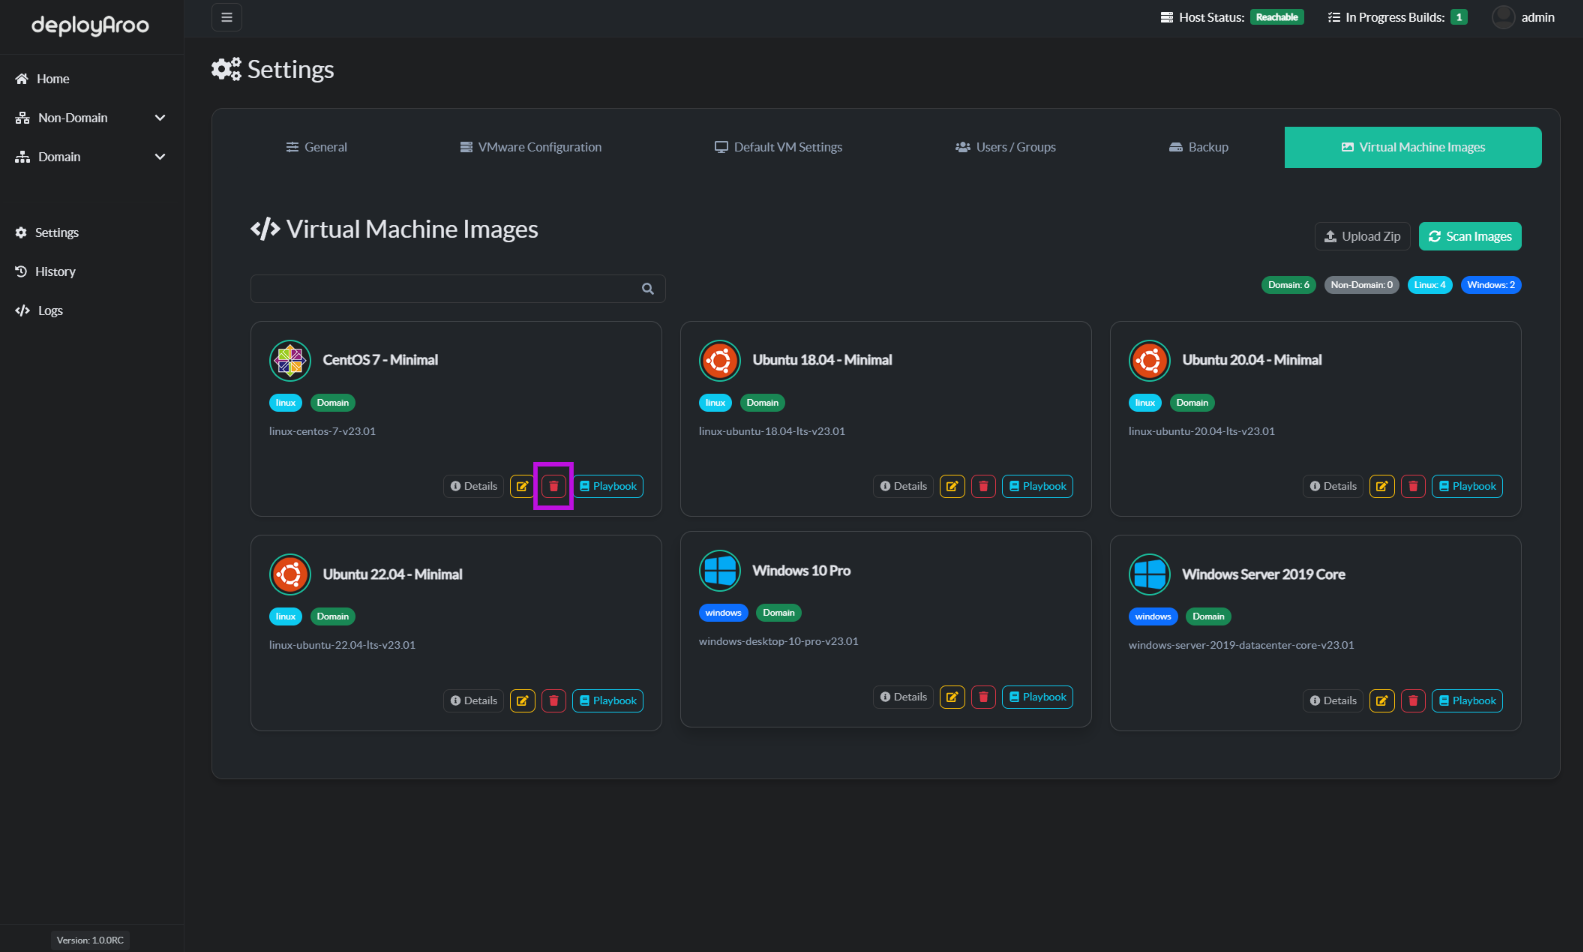
Select Image for Deletion:
- On the Virtual Machine Images page, locate the image to be deleted.
- Click the
Deletebutton next to the image.
-
Confirm Deletion:
- In the confirmation modal, review the image details.
- Click
Deleteto permanently remove the image.
6. Contributing Community Images
Submit Your VM Image to the Community Repository
Tip: Contributing to the community repository helps expand the range of available images for all Deployaroo users.
-
Prepare Your Image:
- Thoroughly test your playbook.
- Create a zip file containing the playbook yml and settings.json file.
- Ensure the folder name doesn't conflict with existing playbooks.
-
Submit Your Image:
- Visit the Deployaroo Images Repository.
- Fork the repository to your GitHub account.
- Add your zip file to the appropriate folder in your fork.
- Commit changes and create a pull request to the original repository.
-
Provide Submission Details:
- In the pull request description, include:
- Image type (non-domain, domain, etc.)
- Use case
- Special configurations (if any)
- Usage instructions
- In the pull request description, include:
-
Await Review:
- Repository maintainers will review your submission.
- Upon approval, your image will be added to the community repository.
- The documentation site will be updated accordingly.
Next Steps
After managing your VM images, you may want to:
Simplify your VM deployments with Deployaroo
Get Started | View Demo (Coming soon) | Report Bug | Request Feature